We at Jamaica Cottage Shop know that a successful build starts with a good foundation. Whether you are adding a small shed or cottage to your yard, or planning something more on the scale of a garage or large cabin, knowing how to properly prepare your building site will save you time and money in the long run.
Do You Need a Permit for Your Building Site?
Each town is different, and the permit you need will depend on the size and type of building you are planning for. Most towns do not require a permit for a building less than 150 square feet. A set back of 25 feet from the property line is common. Jamaica Cottage Shop leaves all local and state requirements for obtaining a permit to be the responsibility of the client. We suggest that you contact your local town clerk to get started.
Ask the following questions:
1. What are the required set backs?
2. What is the maximum size building allowed without a permit?
3. How much will a permit cost?
4. Are engineered stamped plans required for my project?
5. What foundation types are allowed on my property?
Choosing the Right Site
Choose a site that is both level and accessible. Take into consideration water drainage from both the land and the building. Pitch the water away from the shed. Moisture will cause decay and
rot, significantly reducing the life of the building. Remove any shrubs, trees, saplings and other plants that are growing on your building site before starting.

How to Prepare your Building Site
Whether you’re expecting a Fully Assembled Building, Building from a Pre-Cut Kit, or even building from scratch, proper site preparation is key. Each site is unique and specific preparation requirements do vary, but one constant, is to make sure your site is level. A building that is not level will cause the doors to stick and the ramp to not fit correctly.
When leveling your site, the area should be as solid as possible, so once your site and building are level, they stay that way. Minimize the chance of the building sinking out of level by removing any sod, soft dirt or weeds along the way. For best results, use a transit when leveling your site. If one is not available you may also use a 8’ level. After digging and leveling, you complete the bed by adding 3 to 4 inches of compacted gravel. Digging out and leveling the area in which to place the gravel will leave you with a bed that is level and flush with the landscape, as opposed to appearing as a mound above the landscape. When leveling your site, it is also important to take into consideration your shed entrance and ramp.
Pro Tip:
The site must be level for approximately 5’ in front of your entrance door so that the ground that your ramp sits on is level with the building. If this area is not level, your ramp may not fit properly or may be too steep for its intended use.
Laying the Bed
If using a gravel bed, we recommend compacted gravel as opposed to loose. This is, again, to minimize the chance of the building shifting or sinking out of level. The changes in the seasons can cause the earth to heave and give, pushing the shed out of level. If this happens, you can re-level the building by manipulating the site or using wood shims.
Poor drainage can be overcome by first laying a gravel bed regardless of the foundation options you choose. A 3 to 4 inch gravel bed is best. Poor drainage will result in a reduced building life. Proper site preparation is encouraged; hire a professional excavator before the building arrives to prevent the cottage from being “perched”. An improperly prepared site will void the Jamaica Cottage Shop warranty.

Pro Tip:
It is advantageous to install a gravel pad no matter what your foundation type is. This type of foundation preparation encourages proper drainage.
Further Considerations
Who to Hire:
For most people it is best to leave site preparation to professionals. Ask your landscaper or property maintenance team for recommendations on who to hire for the job. We have a list of recommended site preparation professionals as well and assemblers.
Site Visits:
Local clients who would like to purchase a fully assembled building may pay a fee to have one of our drivers do a site visit. They can determine if a fully assembled unit can be delivered to the site, or will let you know if it makes more sense to purchase a kit. Photos of the site and path to the site may be emailed for us to consult first.
Fully Assembled or Pre-Cut Kit:
One thing to consider when choosing a foundation is what type of project you are ordering. With a kit you can prepare your site with any foundation type you choose, since you can build on top of that. If you are ordering a fully assembled project the foundation cannot be higher than our truck bed (preferably less than 12” high). Gravel foundations are ideal for kits and fully assembled projects.
Choosing a Strong Foundation
Different foundations have different best use cases. Here are a few of the most commonly used foundations, and what benefits they can offer your structure.

Cement Blocks:
Durable and economical
Light and simple to install
Supports the most weight due to more intricate structure
We use 4x8x16” solid concrete blocks when delivering fully assembled buildings, and recommend these for kits as well. Each building will require a certain number of blocks depending on how many points the building has. For fully assembled buildings we include the minimum required blocks.
If installing on a slope, or uneven ground, additional blocks may be needed. These can be purchased at a hardware store. We also supply them on delivery for $10 for each additional block needed.

Concrete Piers:
Lower chance of termite infestation
Allows open access to electrical and plumbing systems
Easier solution for a sloped or uneven lot
Cement piers that reach below the frost line are fine for the foundation of your new shed. This choice requires playing with concrete and having the ability to square the tubes. A deck that is not square will cause the entire structure to be untrue.
When placing an order for your cottage, shed, barn, or cabin, ask for the dimensions for the concrete piers that will correctly fit your size building.
Poured Concrete Slab:
Prevents rodents and other pests from nesting under the building
Easier to waterproof
Easier to access for those that have difficulty climbing steps
Eliminates need for a wood floor

Dig out 12” then pour gravel and compact it to a 6” minimum depth before you lay your slab. The slab should be a minimum of 4” thick in the center, reinforced with wire mesh, and at least 6” thick on the edges where it will bear the weight.
Our buildings weigh an average of between 3,000 and 6,000 lbs. A 6x6 pressure treated sill plate can be used instead of a hemlock floor system. Therefore, these buildings will not go anywhere unless you are in an area with extremely high winds. If you do find it necessary to fasten your building to your slab we suggest that you use metal strapping.
Make your slab the same size as your building. For example, if you are buying a 12x20 Sugar Shack the slab should be 12’ x 20’ in size. When your slab is poured you can have flexible metal strapping installed to fasten the building to the concrete slab. If you have an existing concrete slab that you would like to attach your building to, we recommend attaching with a ramset, a high-powered nail gun.
More Foundation Types

Full Foundation
Ideal for cabins, cottages, or any building where a basement would be beneficial. Can be used as dry storage, additional living space or as a work area.
Pour foundation slab so it has 12” deep Rim Footer and 12” deep footers under the support posts. Cast a pocket for beam to sit in. Allow extra depth to so the beam can sit on a piece of Pressure treated lumber to isolate it from the elements. Set the finish height to match the Sills. Cast J- bolts into the top of the foundation, to attach the sills to. Use Sill sealer between the Foundation and the sill plates.
Helical Piles
Helical piles are giant metal screws that are installed in the ground. They have a similar function to concrete piers, but are adjustable. This makes them a great choice for areas that experience frost heaves. Additionally, they can be reused easily if the building site needs to be relocated, and have minimal environmental impact.
For helical piles we recommend working with GoliathTech. For over 15 years they have been an industry leader of helical pile engineering and manufacturing. Visit their website to find a certified installer near you.
Block Wall
Block Walls can be used to achieve a taller wall height for buildings that do not have a floor system. A block wall can be created using concrete, cement blocks, brick or stone. They work well with Jamaica Cottage Shop pre-cut kits, since they can be built at any foundation height. For taller wall heights, get a building with a treated sill plate.
Foundations for a Tiny House on Wheels

One of the advantages of a Tiny House on Wheels is that you do not necessarily need a foundation! However, finding a level spot to park will increase the longevity of your small, wheeled home. Not only that but your comfort level will increase. Tie downs and scissor jacks are typically used, but if you can find a concrete slab to park on, that’s even better. Lifting the building up with jacks will save your tires from going flat.
Pro Tip:
For colder temperature climates you may want to consider adding an insulated skirting to your home to prevent any water pipes from freezing and bursting.
Proper Care and Maintenance
Protect your investment by preserving the building. Choose a paint or stain to match your tastes, but will also provide the right protection for your structure.

For a deep rich natural finish we recommend a clear coat preservative such as linseed oil that will enhance the rustic charm of the product. This will leave you with a fully protected building from moisture, decay and insect contamination. We suggest the cottage be left to cure for a season before treating and be maintained with a coat every five years. The materials we use are rot resistant, but wood is a natural substance that will fall prey to Mother Nature if not taken care of.
Keep It Clear
It is important to make sure that the trees, saplings and shrubbery do not overgrow your shed. You want your new cottage to maintain as much airflow as possible to allow it ample ability to dry out. If your building will be in a heavy snowfall area you should take into consideration the pine trees surrounding it. If your shed sits under pine trees, the sap from these trees will inhibit the roof from properly shedding the snow. This can cause serious damage to your shed if the snow gets too heavy and is not removed.
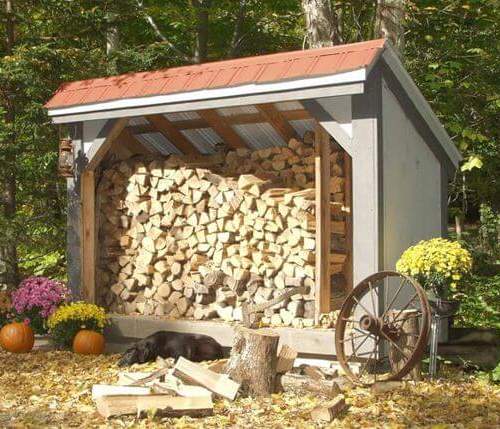
You should never stack firewood, or anything else that will prohibit airflow, up against your shed. Never leave your shed’s doors open in the rain. Also, do not allow debris such as mulch, grass cuttings, etc. to pile up in or around your building. Anything that holds moisture should be kept away from your cottage.
The cottage is strategically placed off the ground to prevent moisture build up and encourage air circulation. Many clients have opted to use lattice to shield the sight of the foundation supports, however we suggest a field stone foundation dry laid under the perimeter walls. This will enhance the aesthetics and give an impression of a much more substantial look. The false dry laid foundation will fit in with the decor and the authentication of the building materials. A true country charm is created.
Pest Protection
Termites are one of the most devastating pests you can encounter. Luckily, aluminum termite shields can be a great solution to thwarting an infestation. Place them on top of your concrete blocks before building your floor system. They require no maintenance, and contain no harmful toxins or poisons, making them an easy and practical solution!

The shield is installed between the cement blocks and the skids and it should extend 2” out from the cement block on all sides and then descend on a 45 degree angle, extending another 2”. This forms a metal barrier that will prevent termites from building their mud tunnels up the foundation.
In order to keep pests from making their homes in your new shed, Jamaica Cottage Shop suggests a solar powered pest repellent using ultra sonic sound. You can also make structural choices that make it harder for pests to find a way into your building. Choosing a solid sheathed roof or asphalt shingles instead of corrugated metal can help deter critters.
Creepers, climbers, saplings, shrubbery and other vegetation should not be permitted to overgrow the building. Likewise pushing the cottage tight to a fence, building or tree will inhibit air circulation and or create a passage for insects.
Want to have this guide on-hand as you prepare your building site? Download our Site Prep Guide PDF